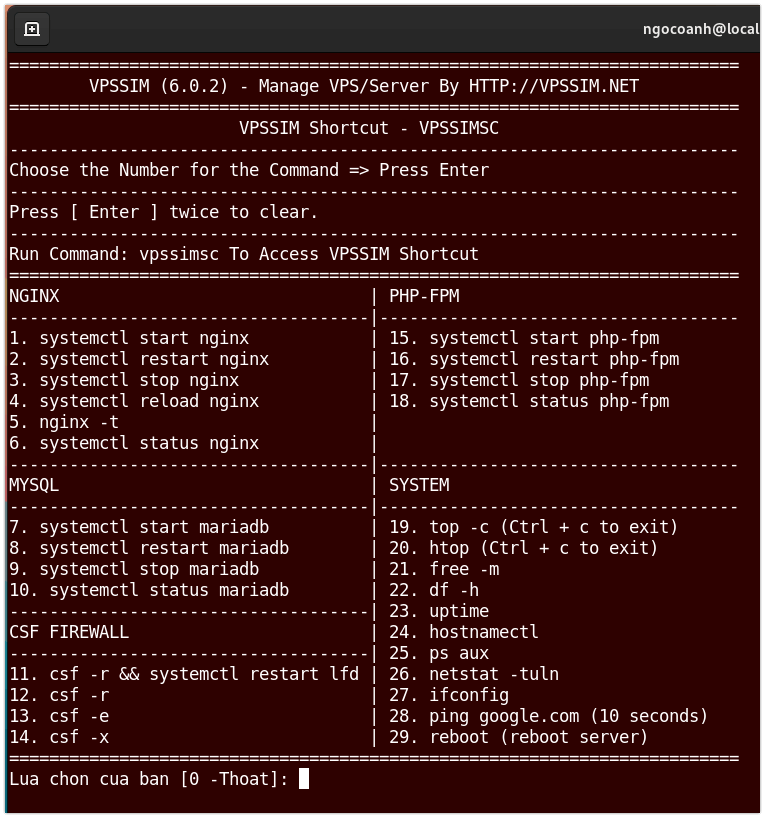
Using VPSSIM with VPS and physical servers is exactly the same, so I will refer to VPS in all cases. If you are using a server, just replace "VPS" with "Server" in your mind!
When using the Add Website feature of VPSSIM, please note:
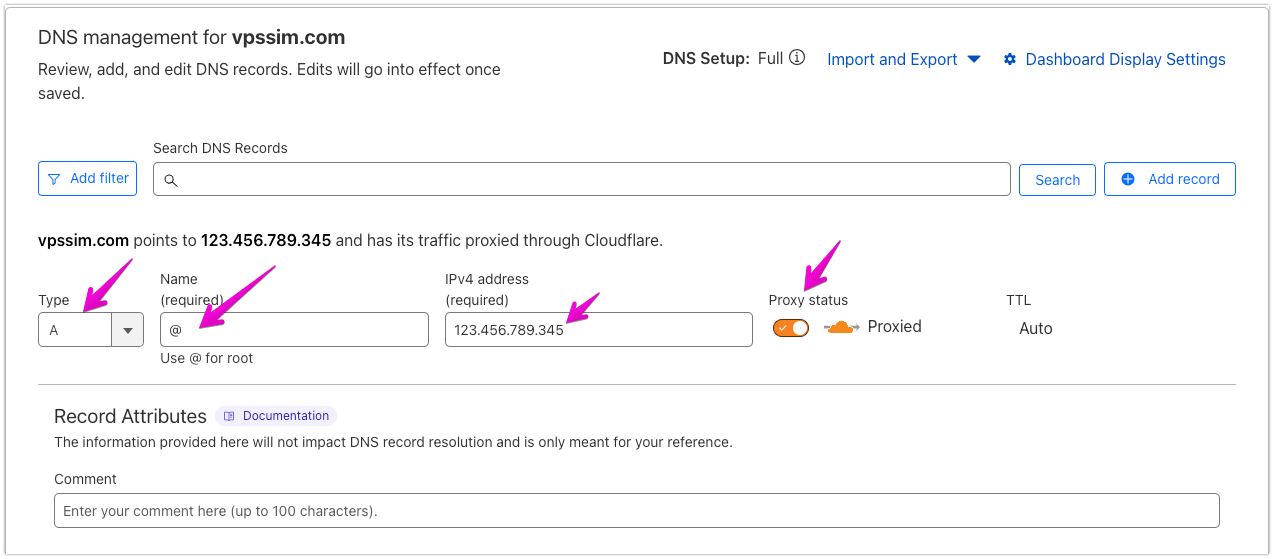
1. Point the Domain to the VPS IP
VPSSIM adds the website to the VPS, but for your website to run on that VPS, you must point your domain to the correct VPS IP. To do this, log in to your domain management page and configure it there.
2. Use Non-WWW or WWW Domains
VPSSIM supports both WWW and non-WWW versions. If you prefer a specific format, add the domain in that format. If you add the WWW version, accessing the non-WWW version will automatically redirect to the WWW version.
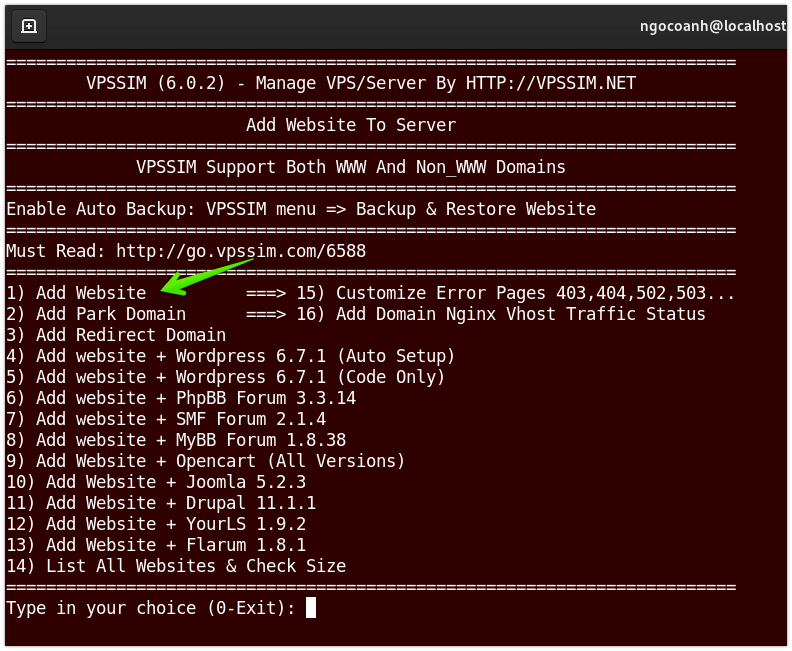
In the past, people often typed "www" before the domain, but now it’s unnecessary, so it is recommended not to use the WWW version at present.
3. Create and Add Sub-domains
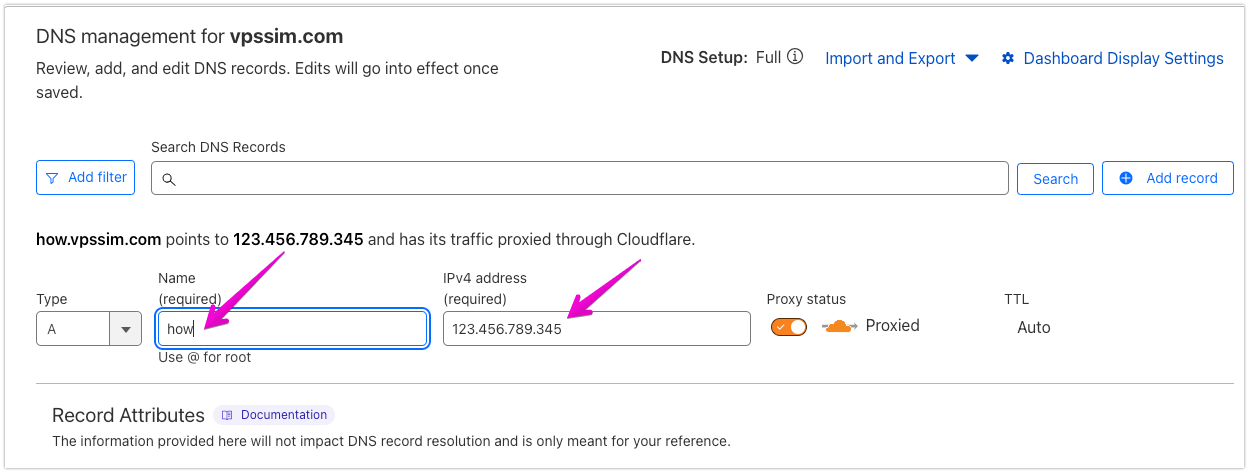
VPSSIM does not support creating sub-domains and cannot do so with the Add Website function. To create a sub-domain, log in to your domain management page (such as Cloudflare) and create the sub-domain there. Point the sub-domain to your VPS IP, then use the Add Website function as usual.
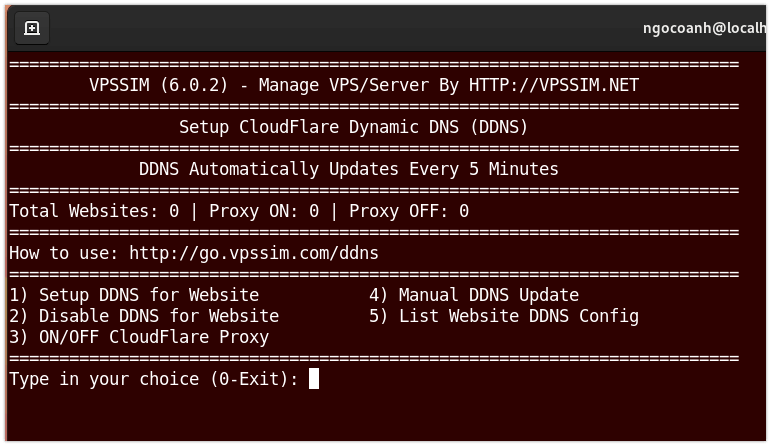
4. Cloudflare Dynamic DNS Issue
If you use the Cloudflare Dynamic DNS Setup feature of VPSSIM for websites hosted on a home server, make sure your ISP opens ports 80 and 443 first. Otherwise, even if VPSSIM automatically points your domain to the correct IP, visitors won’t be able to access your website.
5. Add Code and Set Chown Website
After uploading your website’s code to the domain root directory (e.g., /home/adb.com/public_html) or downloading a zip file and extracting it, set the correct Nginx and PHP permissions before using it. Otherwise, you may encounter errors such as failed installations, runtime issues, or upload failures.
Permission setup:
VPSSIM Menu => Fix Permission & Chown Error
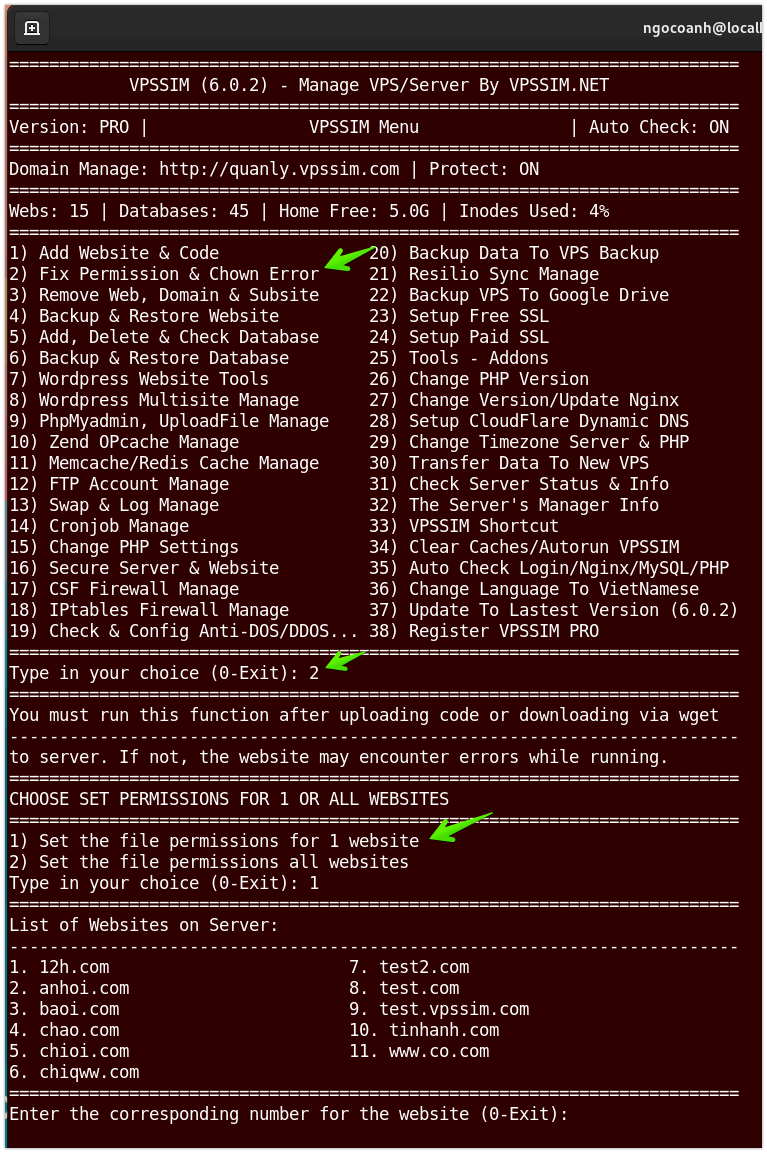
If you add code using Add Website + Code (such as WordPress, SMF, phpBB, etc.), VPSSIM automatically sets the correct permissions after downloading the code, so you don’t need to perform this step.
6. Configure Vhost
Unlike Apache, where you can run code immediately after uploading, VPSSIM uses Nginx Web Server. If your uploaded code doesn’t work with the default config, you need to adjust the Vhost. Always back up the old content before editing so you can easily restore it if something goes wrong.
To edit, use nano (for direct editing in Terminal) or geany (for sFTP editing).
After saving, check the configuration with:
If there are no errors, the result will be:
nginx: the configuration file /etc/nginx/nginx.conf syntax is ok
nginx: configuration file /etc/nginx/nginx.conf test is successful
Then reload Nginx to apply the changes:
Alternatively, use the VPSSIM shortcut to run Restart Nginx or Reload Nginx.
Note: Editing Vhost can easily crash Nginx, causing the server to go down. Always run nginx -t before restarting. Restarting involves both stopping and starting Nginx; if there are errors, Nginx won’t start again after stopping.
7. Clear PHP Cache (Zend Opcache)
After editing your code, if changes aren’t reflected on your website, it’s likely due to PHP caching with Zend Opcache stored in RAM instead of disk for performance. To update your code, clear Zend Opcache after editing.
Options to clear Zend Opcache:
I) VPSSIM Menu => Manage Zend Opcache => Clear Zend Opcache
II) VPSSIM Menu => Clear Cache/Autorun VPSSIM => Clear Zend Opcache
III) VPSSIM Shortcut => Restart PHP
IV) Run Command:
If you frequently change code, temporarily disable Zend Opcache for that website, edit, then re-enable it.
Disable it by adding the website to the Zend Opcache blacklist in Zend Opcache Manage.
path: VPSSIM Menu => Zend Opcache Manage => Add Website To BlackList
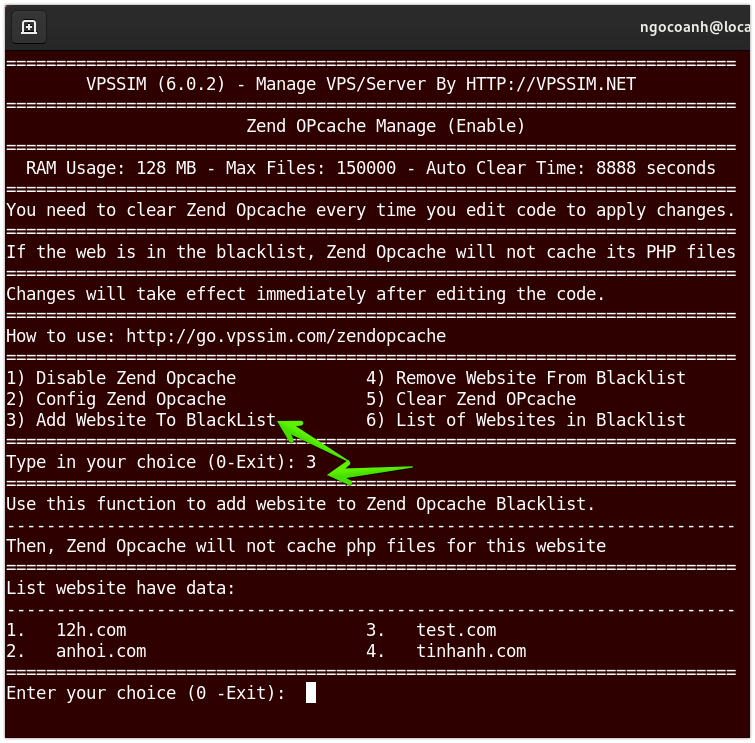
After finishing, remove the website from the blacklist using Remove Website from Blacklist.
8. Customize Error Pages
To change Nginx’s default error pages (403, 404, 502, etc.) for your website, use the Customize Error Pages function.
Path:
VPSSIM Menu => Add Website & Code => Customize Error Pages 403,404,502,503
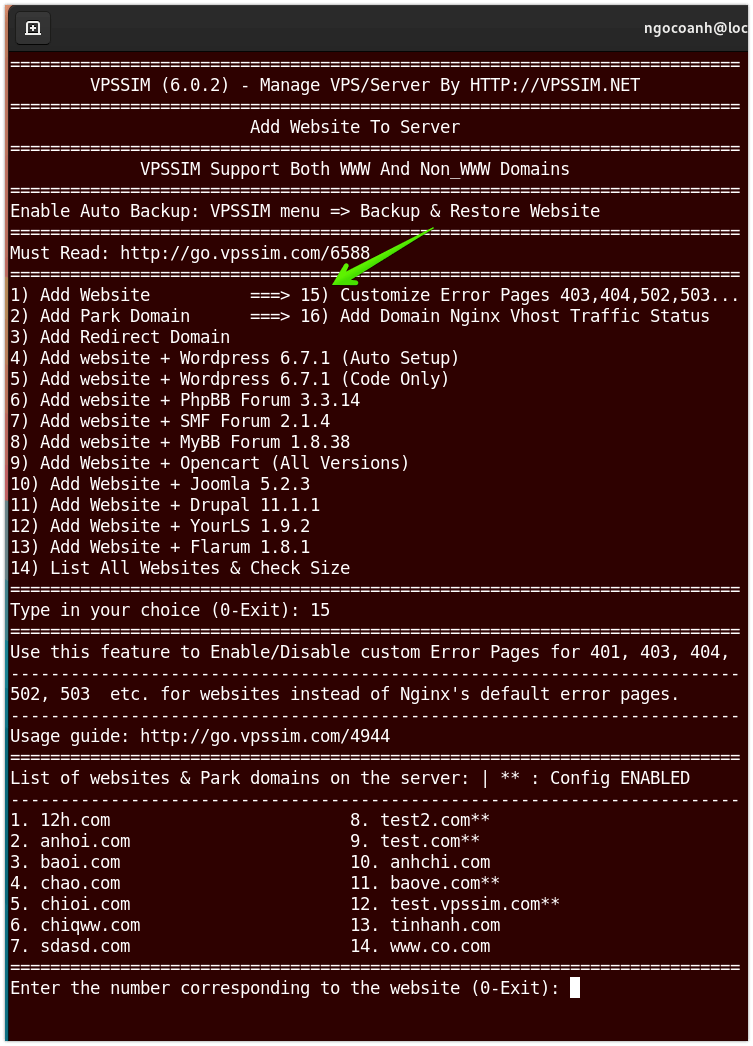
In the image, websites with custom error pages enabled have a ** symbol next to their name.
9. VPSSIM Shortcut
(This is unrelated to adding websites but useful for running many Linux commands without typing long lines.)
To use VPSSIM Shortcut, run:
vpssimsc
or navigate to VPSSIM Menu => VPSSIM Shortcut.
