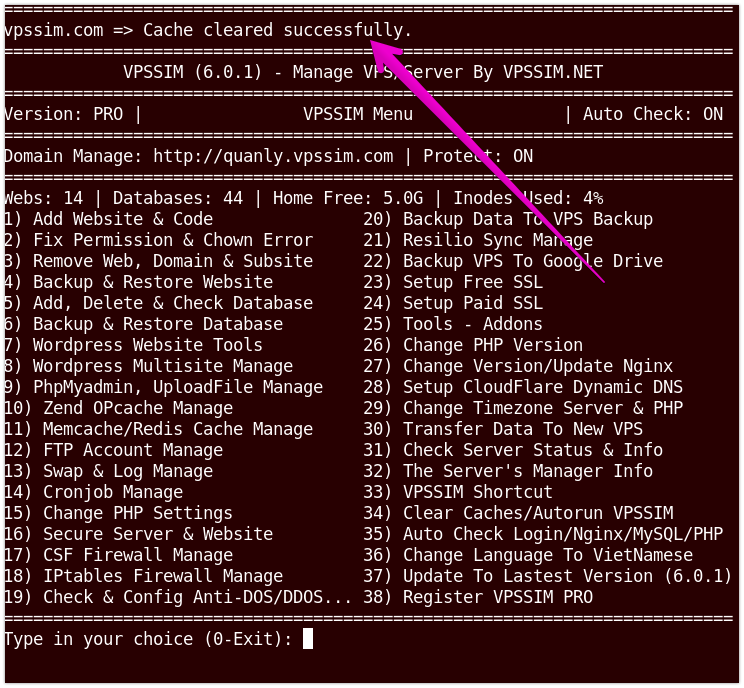
I often use this to clear cache for VPSSIM.COM and VPSSIM.NET whenever I update a new version of VPSSIM. If I don’t clear the Cloudflare cache for these two domains, several hours after updating, users will still be using the old version. In some cases, even when they update, the update files are still old, while the version files are new because the cache age of the version files in Cloudflare is shorter, causing it to be cleared before the VPSSIM files, which are cleared later.
Many users install the Cloudflare plugin in WordPress and set it to automatically clear the Cloudflare cache whenever they post a new article. However, I believe this practice is not recommended for two reasons:
- When this mode is enabled, posting time increases because the server sends a signal to Cloudflare to clear the old cache. The website then needs to both clear the cache and add the new post, which significantly increases server load and slows down performance.
- Cache is not fully cleared. If there are many static files unrelated to WordPress, they will not be cleared.
If you want a complete cache clear, you need to log in to your Cloudflare account, navigate to the cache section, and manually clear it.
Therefore, I usually create a bash script to clear the cache directly from my machine for faster performance. Since this might be helpful to others, I’ve integrated this feature into VPSSIM for easier usage in this update.
Below are instructions for using the “Clear Domain Cache on Cloudflare” feature in VPSSIM:
Before using this feature, you need to have a Cloudflare API Token to connect this functionality in VPSSIM with your Cloudflare account.
Steps to get an API Token:
- Log in to your Cloudflare Dashboard.
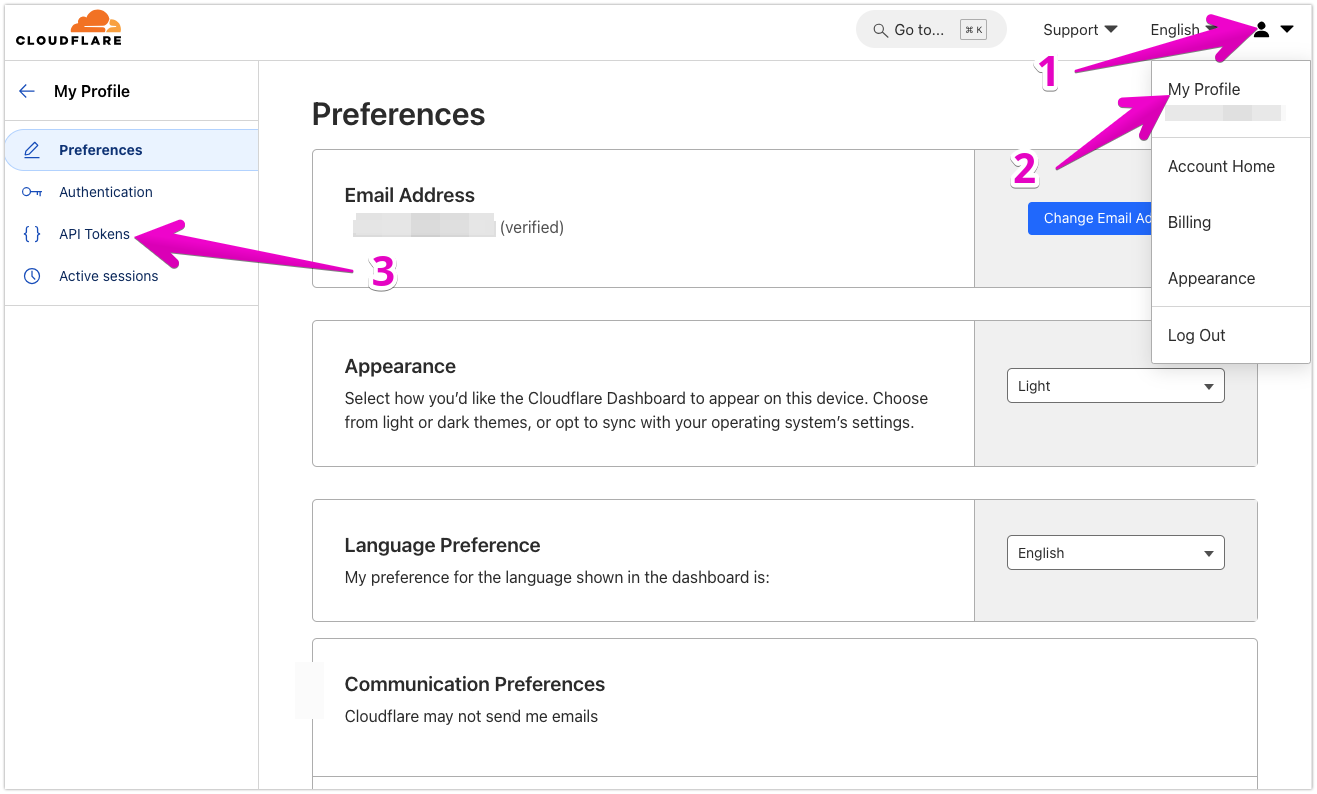
- In the upper-right corner, click My Profile.
- In the left menu, select API Token.
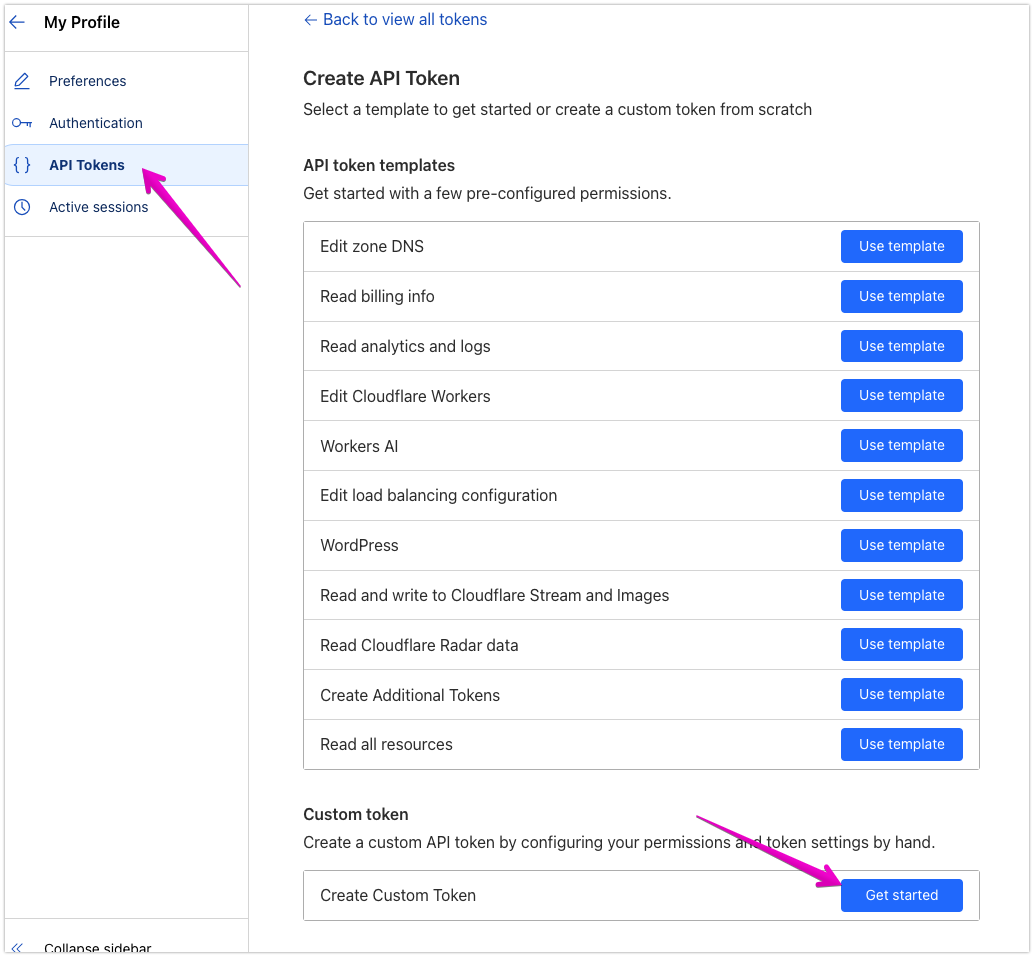
Next, create a new API Token
Step 1: Click on the Create Token button.
Step 2: Under the Templates section, select Custom Token and click Get Started to set permissions as needed.
Step 3: Enter a name for the token (e.g., "Clear Cache Token").
Next:
You select as shown in the image below:
For the permissions section:
Zone → Cache Purge → Purge
Under the Zone Resource section,
Select Include → All Zones
Then, at the bottom, click Continue to summary and then click Create Token to complete.
Once successfully created, you will see the API Token appear along with a Copy button to copy the token.
Note: Make sure to save this token right away. Cloudflare will not show it to you again after you close it.
Now that you have the Cloudflare API Token, let's link it with VPSSIM's cache clearing functionality.
Function path:
VPSSIM menu → Clear Caches/Autorun VPSSIM → Clear Domain Cache On CloudFlare
On the first run, VPSSIM will ask you to enter the API Token we created above.
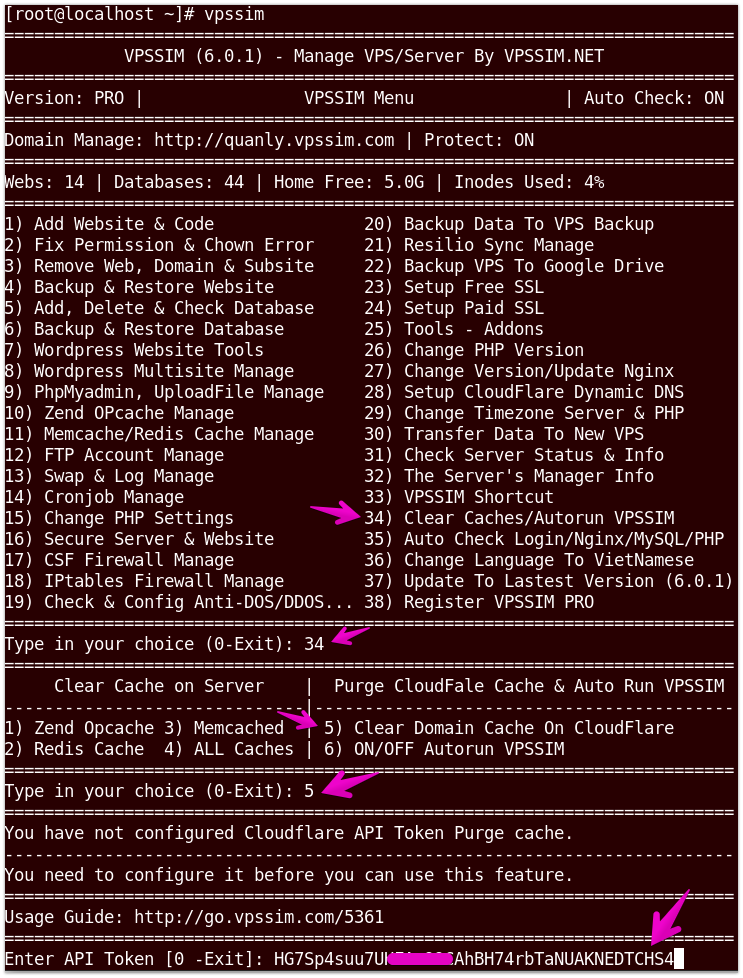
After entering the token, VPSSIM will verify it. If it is correct, you can start clearing the cache for the domains.
Now, in the Clear Caches/Autorun VPSSIM function, select Clear Domain Cache On CloudFlare → Clear Domain Cache
VPSSIM will automatically fetch the list of domains in your Cloudflare account. You just need to select the domain you want to clear the cache for.
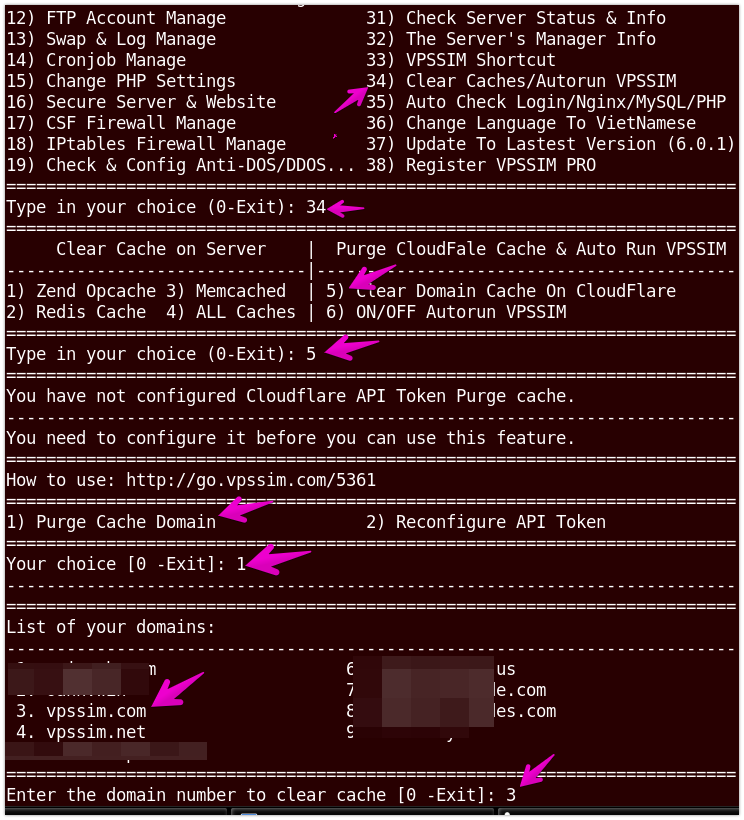
and finished the job:
